|
Creating or buying jewellery for bridesmaids can be a tricky business. Regardless of the scale of a wedding, if there will be bridesmaids then there will undoubtedly be different ages, sizes, styles and characters to consider – and so if you are trying to achieve a uniform look, this can be a challenge! To do this for bridesmaids, you could either decide on a colour or motif and then choose a selection of different jewellery styles to suit people based around that feature, OR choose classic and understated pieces that everyone can wear. For example, a pendant is a safe bet for all ages. Chains can be adjustable for all sizes, and shorter options can be purchased for children to wear. Earrings, on the other hand, are more difficult, as not everyone has pierced ears and you have to consider skin sensitivity that some people may have to certain metals. Also, the weight of earrings can be an issue for some; what is right for one person might be extremely uncomfortable for someone else.
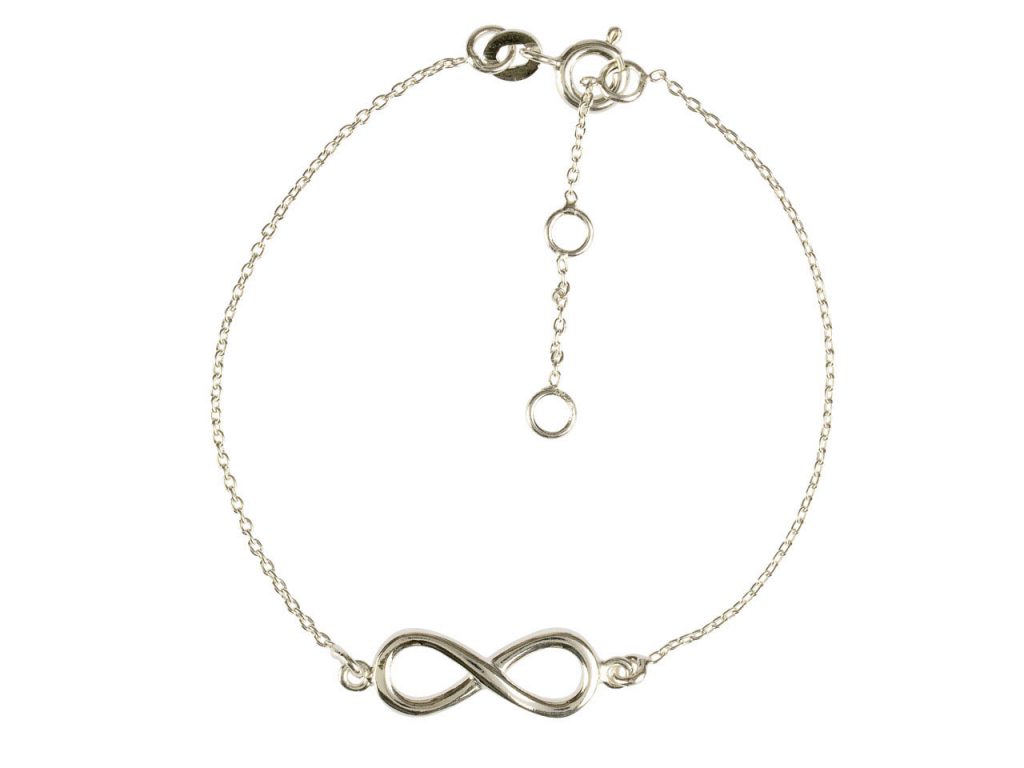
Sterling Silver Bracelet with Infinity Locator (XBS 2036) Our range of infinity themed pieces would make a great starting point for any bride wanting to choose from a suite of jewellery to suit all ages. The sentiment behind it is perfect for a wedding, and the range of designs available means there is something to suit all tastes.
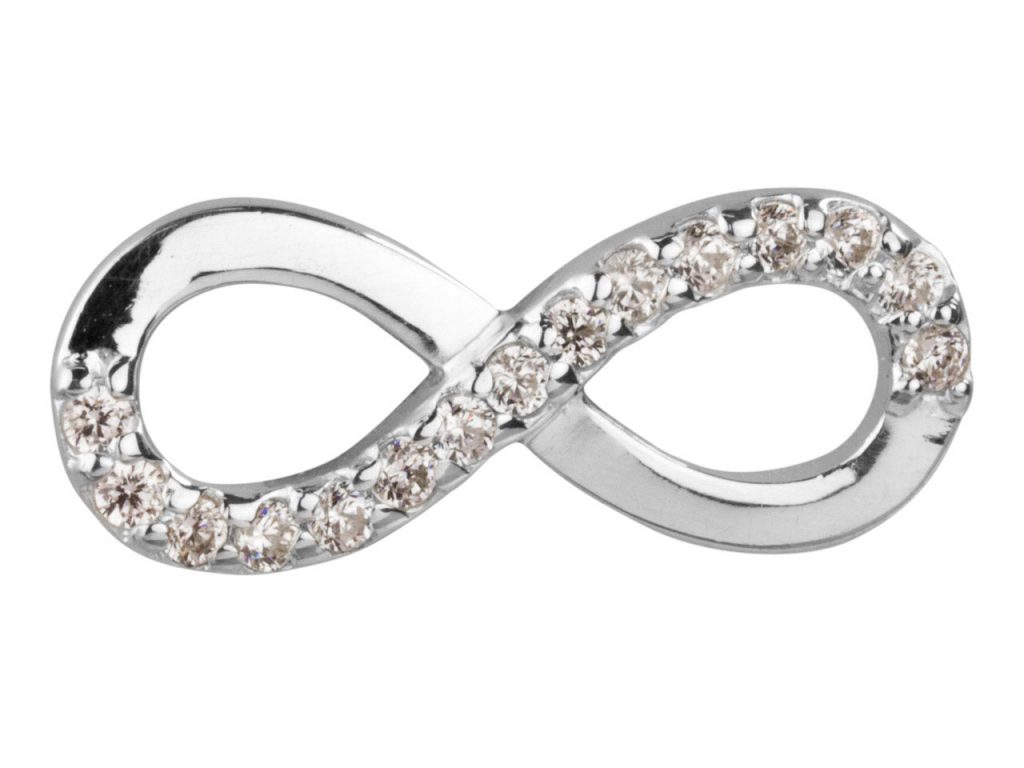
Sterling Silver Cubic Zirconia Set Infinity Connector (NV1 545) We also stock connectors in the same design, which could be used to connect a small chain for a child, hung as a pendant or even tied around a wrist with ribbon, whilst still keeping within a theme. You could add some beads to your connector too if you are looking to unify the look with both colour and design. The simple yet classic look of these connectors also means they can be a really great addition to jewellery for tricky bridesmaids!
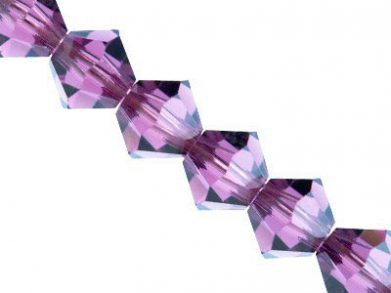
Swarovski Crystal Bicone Beads If you using colour as your unifying element in a wedding, Swarovski Crystal beads would make perfect bridesmaid accessories. They come in a wide range of styles, sizes and tones to match any theme, and would be gorgeous strung onto elastic to make bracelets which will please any flower girl.
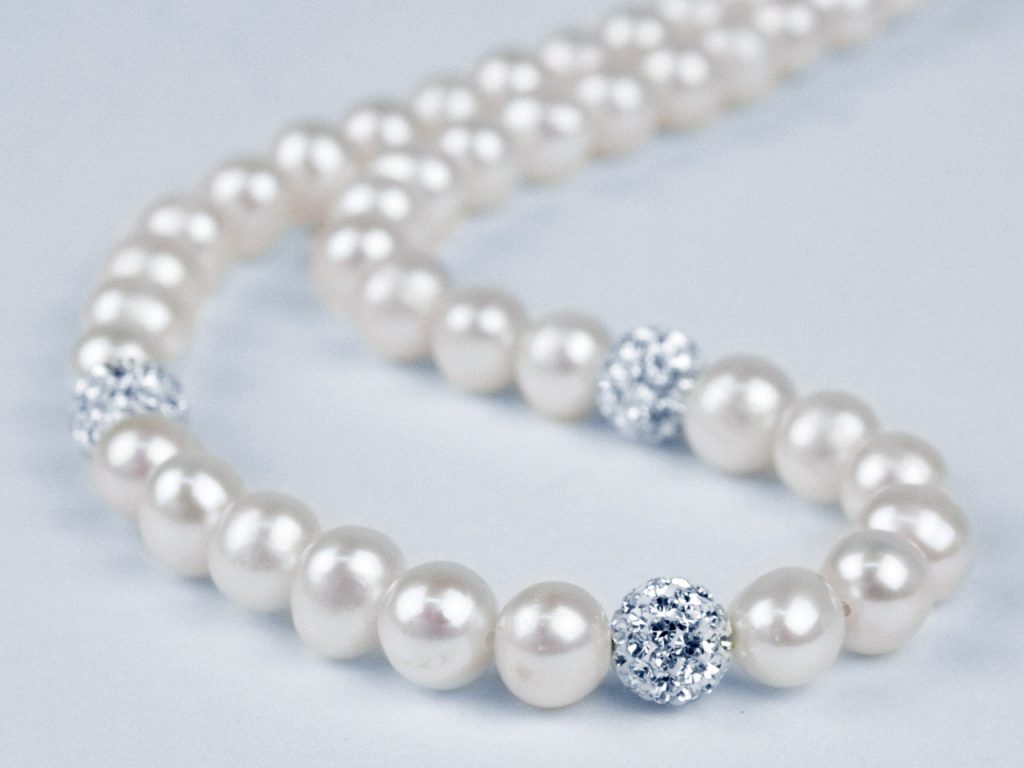
Fresh Water Pearl and Crystal Necklet (VPS P303) For something with a more classic look, you really can’t go wrong with pearls and we have an extensive range of pearl jewellery to suit all styles. For example, our pearl and crystal necklet has just enough sparkle to make it really special without being too attention-grabbing, and can be easily teamed with a pair of simple pearl or crystal studs for those with pierced ears – yet are impactful enough as stand-alone pieces for those without.
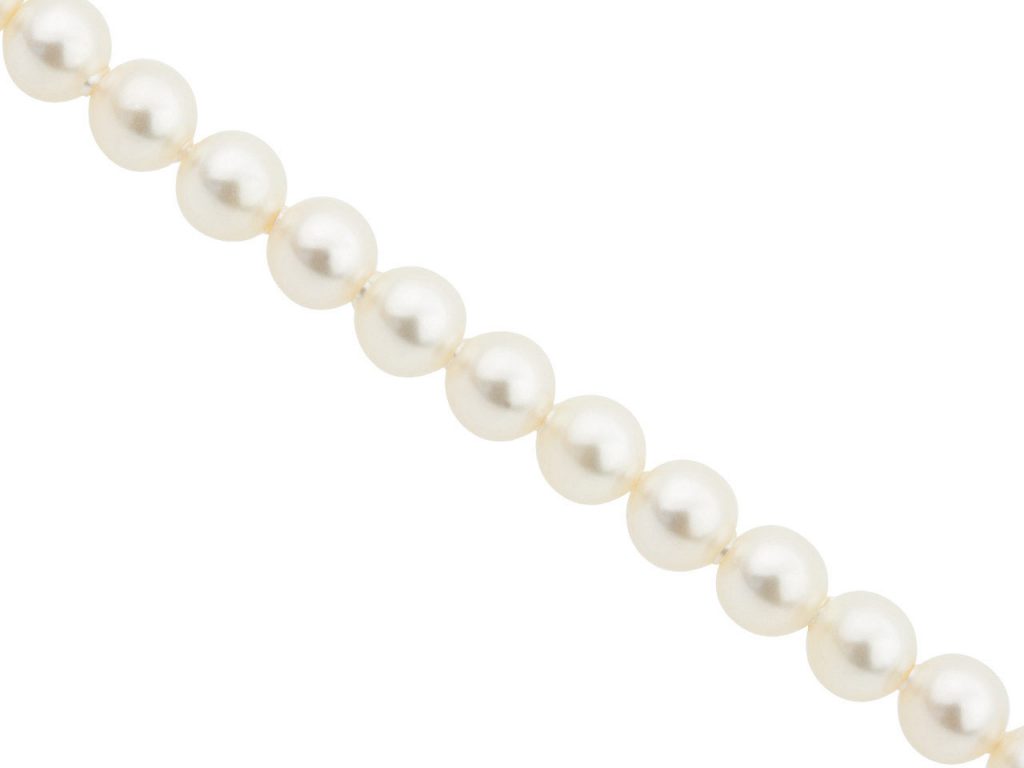
Swarovski Crystal Pearls On the other hand, if you would prefer to create your own piece of pearl jewellery, our selection of Swarovski Crystal pearls are available in a variety of colours and sizes. This means you have plenty of choice when it comes to making handmade jewellery for bridesmaids. It doesn’t matter whether you are looking for finished jewellery or components to create bridesmaid jewellery yourself, as you will find a wide selection of products to choose from at Cooksongold. Explore our range today and make sure you are prepared for wedding season or even your own big day. source https://diamonds-jewelry.net/top-posts/choosing-wedding-jewellery-for-bridesmaids/ Via https://diamondsjewelrynet.tumblr.com/post/182422738112
0 Comments
Earring posts for jewellery making are a simple finding to start producing yourself. It’s easy to make them in bulk so that you have them to hand whenever you’re ready to bring all the elements of your designs together to make your own stud earrings. To help you kick start your earring making process, here’s our guide on how to make earring backs in two stages. Here’s how to make earring backs by hand:Stage One: How to make earring posts with silver wireYou’ll need:
Prepping your silver wire
Top tip: When working with such small jewellery findings you may benefit from steadying the earring post as you file. One simple way of doing this is using small notch in your bench peg to steady the earring post and keep it flat as you file. Remember that light pressure is all that’s needed as you don’t want to shorten the earring post by being too heavy handed.
Filing to a point
Onto soldering…. Stage Two: How to solder earring postsYou’ll need:
Set up your workspace
It’s time to solder
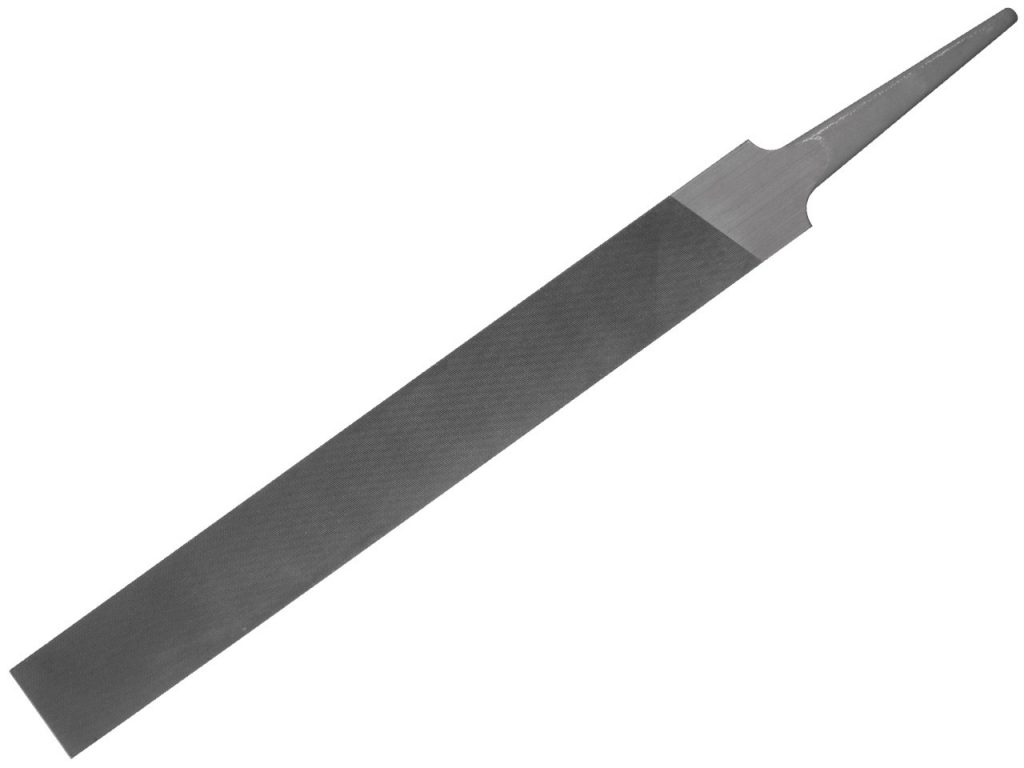
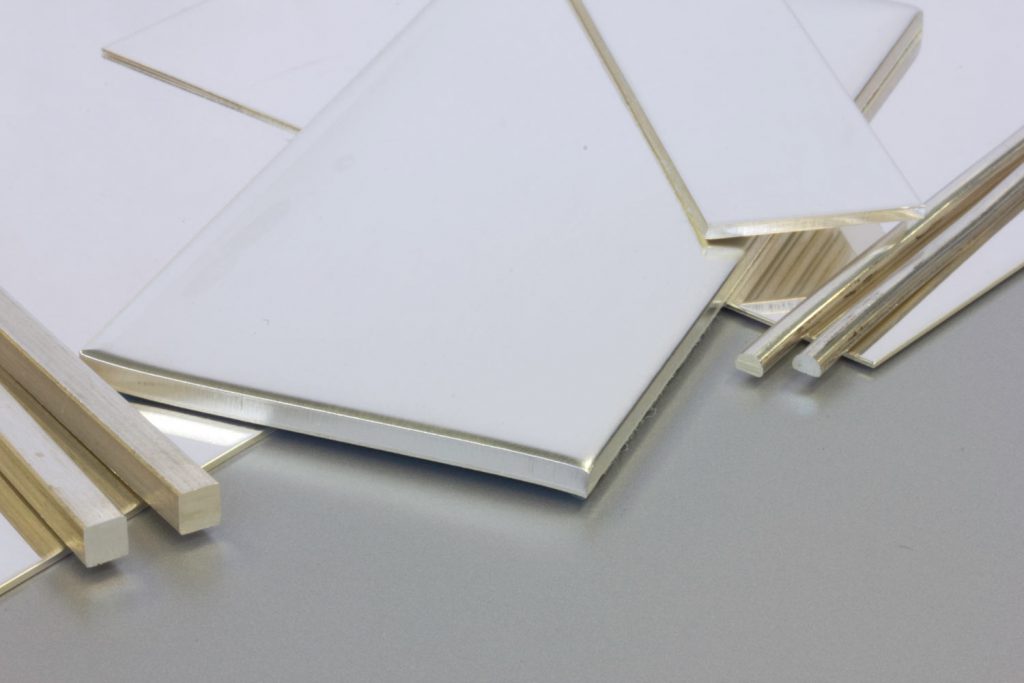
Now you have the basics of earring making perfected there’s no end of designs you could produce. Pick up all of the jewellery tools and supplies you need to make your own stud earrings at Cooksongold today. From silver wire, to high quality hand files, and soldering kits – we have everything you need to produce professional stud earrings. source https://diamonds-jewelry.net/top-posts/how-to-make-earring-backs/ Via https://diamondsjewelrynet.tumblr.com/post/182293109682 With so many varieties of metal available, we thought we would go back to basics and examine some of the different types of metal that can be used for jewellery making today.
To begin with, let’s look at some of the general terms you might come across when dealing with metal: What is Precious Metal?A precious metal is a naturally occurring metallic element, which is rare and therefore highly prized and valued. Gold, silver, platinum and palladium are all examples of precious metal. What is a Metal Alloy?Precious metal in its pure form is often difficult to work with, so it is mixed (alloyed) with other metals to enhance its strength and workability etc. when making jewellery among other things.
What is Hallmarking?To be sold as such, all gold, silver, platinum and palladium products above a specified weight have to be independently tested (assayed) and hallmarked. This procedure is a guarantee for consumers, so they can be sure of what they are buying as it is impossible to tell simply by eye. The minimum weight thresholds for hallmarking are as follows:
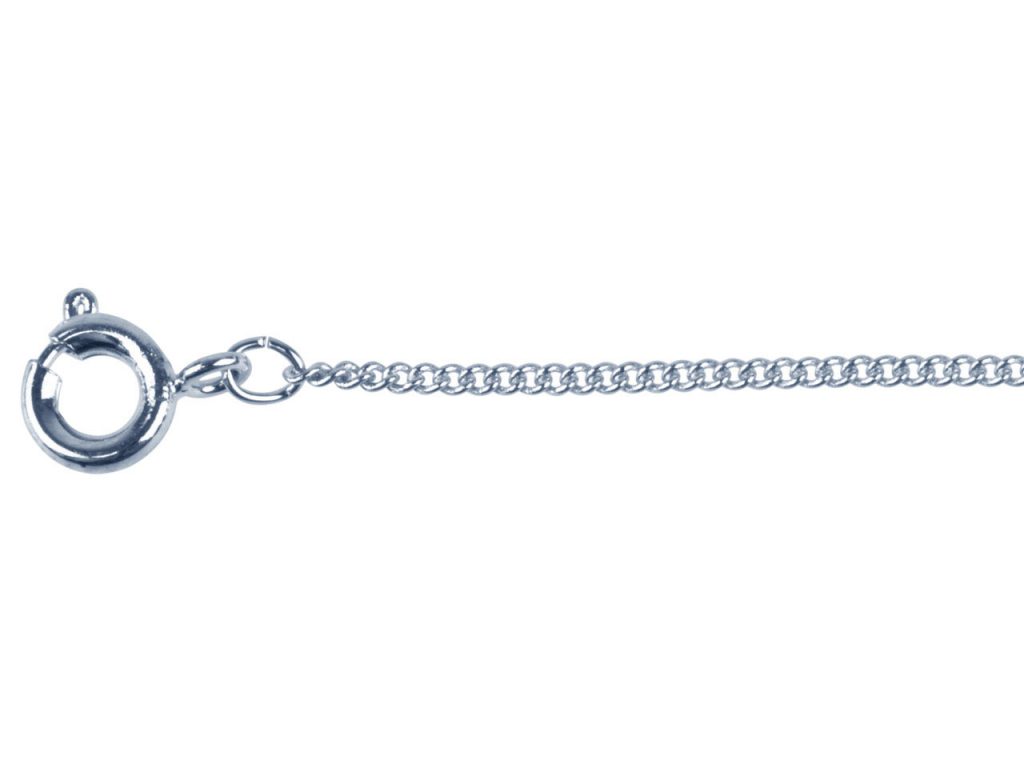
It is also important to remember that a hallmark is a legal requirement, and so must be adhered to where necessary. Want to learn more about hallmarking? Get started by reading our guide to hallmarking, and to discover how hallmarking began you can also take a look at our brief history of hallmarking. What is Plated Metal?Plated metal has a thin coating of a secondary and often more expensive material which covers it completely. It is often done to improve tarnish resistance and/or make something appear more expensive than it actually is. Common examples are gold plated silver (sometimes known as vermeil if the plating depth is around 2.5 microns) and rhodium plated silver. Base metal findings and chain are popular jewellery making components which can be made from plated metal.
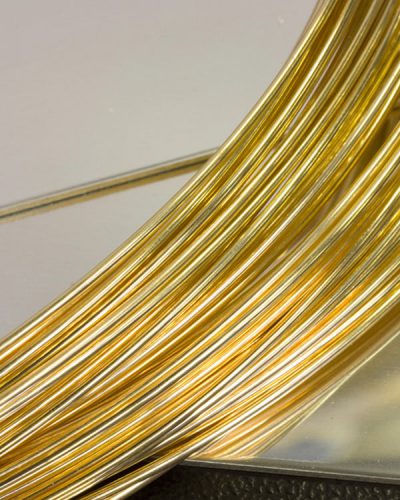
Silver Plated Chain Plating depths vary and some are much thinner than others, meaning pieces will be more prone to wear and tear (standard plating is usually between 0.5 – 1 microns, and heavy plating is usually between 2.5 – 5 microns). This means that most plated items will need to be refreshed and re-plated on a regular basis to keep them looking their best. It is worth noting that plated metal items can only be hallmarked with the mark for the lower grade of metal used, as the plated coating has no bearing on the value and cannot be stamped. What is Bonded Metal?A bonded metal is a grey area in terms of description, and ideally should contain two elements which are fused together to make one piece. However, many bonded gold items have simply been gold plated, albeit sometimes to a greater depth than standard plating. It is worth noting again that bonded metal items have to be clearly hallmarked, and can only be stamped with the lower grade of metal used – meaning a gold/silver bonded item would be hallmarked as silver. What is Gold Filled Metal?Also known as rolled gold, the term ‘gold filled’ refers to a layer of gold which is wrapped and bonded (via heat) around a second metal (either silver or base metal).
Gold Filled Lobster Clasp This gold layer, although thin, is much harder wearing and substantial than any gold plating and can be hallmarked as such. Beaded wire and chain are just some of the jewellery making components which are available that can be made from gold filled metal. It is vital that you know exactly what you are buying when purchasing precious metals, as mistakes can be costly and can lead to items being illegally sold – so make sure you research your products before committing and you won’t go far wrong. source https://diamonds-jewelry.net/top-posts/different-types-of-metal-for-jewellery-making/ Via https://diamondsjewelrynet.tumblr.com/post/182240904772 For any avid jewellery maker, there are always different and exciting ways to expand on your skillset and your collection. Whether you try your hand at new designs for technique practice, or you expand your range to include items you maybe didn’t offer before, there are lots of avenues to explore when it comes to broadening your repertoire. One way we’ve looked at broadening your approach as a small jewellery business, in this article, is the addition of antique jewellery. Some customers search far and wide for pieces from certain eras, or a trademark design that perhaps is no longer manufactured. There’s opportunity in re-working antique jewellery for re-sale, which is why we’ve come up with some of the best places to go to buy antique jewellery. Where to buy antique jewellery
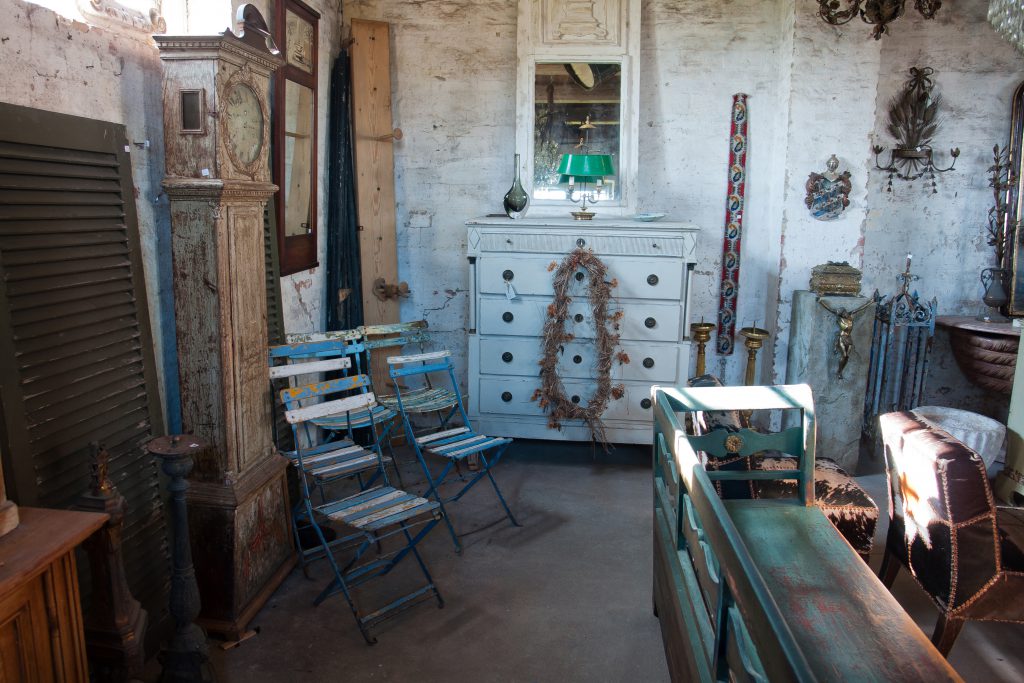
Antique shopsSounds obvious, but you’ll uncover many hidden gems at some of the UK’s best antique shops. Search through antique furniture and clothing to find pendants, rings, bracelets and other antique jewellery that you can re-work for re-sale. For example, maybe you’ll discover some antique ring settings without stones? There’s opportunity here to get your bezel roller and add gemstones to empty bezel cups. We’ve listed some of the UK’s best antique shops below, but of course there are more to choose from:
eBayYou’d be surprised at the selection of antique jewellery available on the world’s biggest online auction site!
Packed with sellers and buyers, eBay is an ideal place to research your antique jewellery projects and get a feel for what other likeminded people do when it comes to antique jewellery. You may find some people are selling chains, ring settings, brooches or even clasps that can be used to recreate timeless designs. It’s worth reading through seller reviews and maybe getting in touch with them if you have any queries about their product. You could even start building up a network of contacts to keep in touch with about your antique jewellery endeavours – maybe even your entire jewellery business. Auction houses
There are plenty of auction houses dotted around the UK where you can pick up some unique antique pieces, as there are endless online auction rooms offering the same opportunities. Discover gems from the Edwardian belle époque era, when platinum was introduced as a unique selling point for a lot of beautiful pieces. Discover diamonds from Colombian and Burmese origins, which are in high demand by a lot of jewellers. Even pearls could have a rich history worth investing in – you never know which monarch may have owned them, and from which ancient empire. Some of the best auctions to attend or search online are as follows:
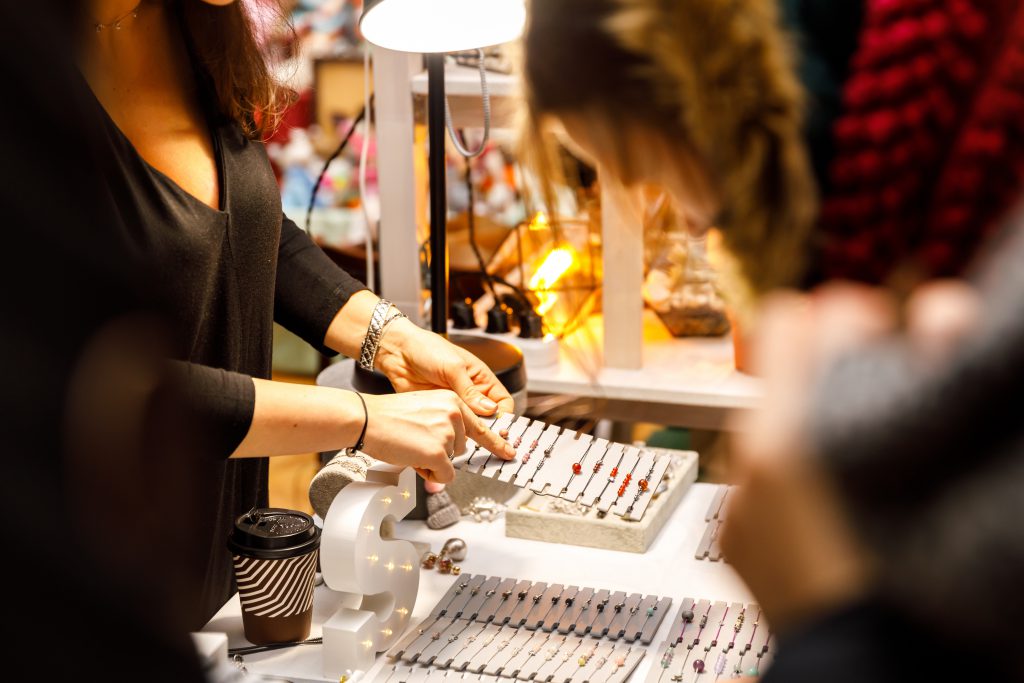
Markets
Markets are an ideal place to uncover hidden antique gems:
If you’re looking for antiques near your home, it’s worth investigating the nearest stores or markets. Online forums for antique jewellery are an ideal place to begin, especially if you’re hoping to share your ideas with others and find out more about where to buy antique jewellery. And if you’re looking to sell antique jewellery? You can create a seller account on eBay, or even other online marketplaces within Etsy or using your own dedicated website. For more information on your jewellery business, and further advice on how to make it a success, check out the content in our business advice hub. source https://diamonds-jewelry.net/top-posts/buy-antique-jewellery-to-re-work-for-re-sale/ Via https://diamondsjewelrynet.tumblr.com/post/182188606832 Trained goldsmith and jewellery tutor Tamara works mostly with use silver and enamel to create her designs, although is open to using a wide variety of other materials when making conceptual jewellery pieces. Read on to learn more about her work, the advice she would give to those who are new to the industry and more. Let us know a bit about yourself, detailing your background, study and training in the jewellery making industry. I am a trained goldsmith and jewellery artist born and living in Serbia. Until my thirties, I was a manager and marketing specialist, and even before that I was just a girl fascinated with many forms of art, so in a way being jewellery artist for these last eight years is going back to my roots. There is one saying in my country, “craft is learned by stilling”, meaning that you can only learn craft by watching some artisan at work. I can agree partially with it. In my case, I gained a great basis at Polytechnic school from my mentor, and the rest was courage to struggle with all the crazy ideas I have and implement them in my work. 
Photographer: Jelena Damjanovic Tell us about your work – are there any particular materials or techniques that you favour? In a few words, I feel like a kid in a store. Out there are such wonderful choices of materials, techniques and possibilities. At the moment I am working mostly with silver and enamel, and even though they are rather conventional materials I try to use them in an unconventional way. In my conceptual jewellery, I use a variety of materials and every material I use demands investigation of possible ways to transform it into the design. How would you best describe your design style? Maybe the best description of my work I got from the female audience. They say that all my pieces, even conceptual ones, are very feminine and poetic. I must confess, poetry was one of the forms of art I was interested in. As a jewellery maker, where do you like to get your inspiration from for your pieces? In a way, there is a constant feeling that I am behind with the schedule. Yes, artists do have schedules. Mine is one large notebook full of new projects and ideas waiting to come alive. Most of the new ideas I get when I am in transportation or when doing something not so inspiring; obligatory things. So if you ever see me with the “out of here” look in my eyes, you will know a new project is being born. 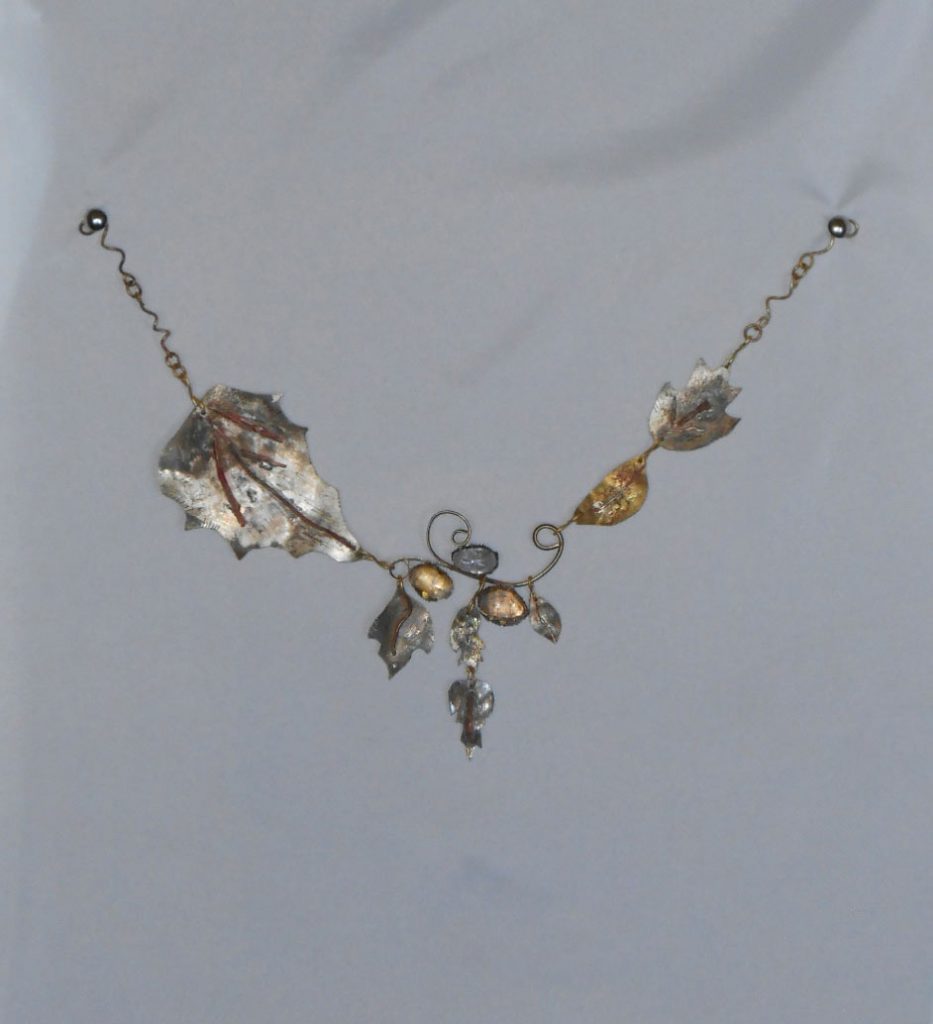
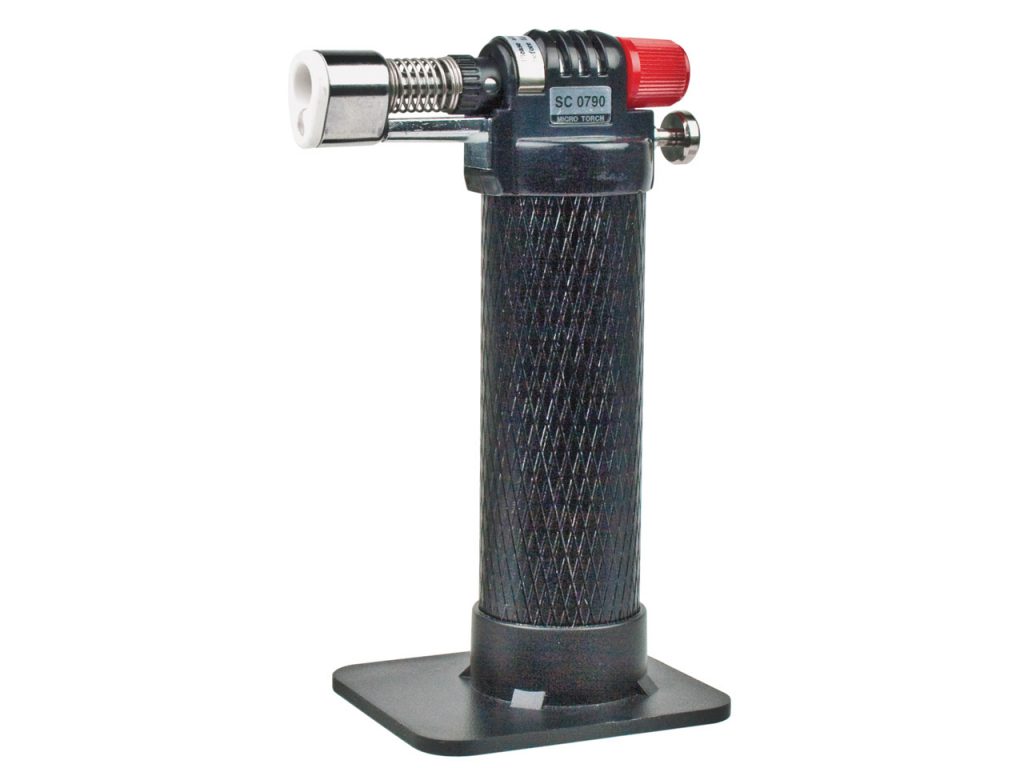
Photographer: Jelena Damjanovic Do you have a piece that you have made which you favour or are particularly proud of? It will always be my next piece. However, many give me a big headache when I make them and I feel great joy when they were finished. What is the one item in your jewellery making workshop that you could not live without? As my mentor said to me, the two most important tools in every workshop are a jewellery saw and a torch. I agree. Of course, the longer as you work, the more tools you need. What upcoming trends do you see being popular soon? Being a jewellery artist, I am happy to see that the wider audience is more interested in conceptual jewellery and unusual materials and techniques. These works of art are something that can be worn (every day), that can be proudly shown and that speaks much more about its owner than traditional ones. 
Photographer: Jelena Damjanovic What is the most valuable lesson you have learnt from your time in the jewellery making industry? If you believe in yourself, you have one great supporter and there are no limits to what can you achieve. Recently I had a conversation with a person who worked as a goldsmith for forty years. He said “don’t be afraid to make a mistake. Whenever I made a mistake, I have learnt so much. Mistakes are important!” Do you have any particular advice that you would give to up and coming jewellery designers, or someone interested in getting into jewellery making? Next to my art, I work as a teacher of jewellery techniques. To all my students I give a few pieces of important advice: to try different techniques – one of them will be right for them, to enjoy working – fun is an important component in every good piece, and to learn the basics so that they could be free creating. So in all, be confident, be brave with your craft and you’ll do well! …and finally, time for a bit of fun in our quick-fire round! Tell us your favourite… …colour – this depends on my mood, time of year and the project I am working on …food – all …place – home …city – Belgrade, Firenze …animal – dog
For more details on Tamara’s work, you can visit her website, or feel free to check out her Facebook page or her Instagram page. source https://diamonds-jewelry.net/top-posts/designer-of-the-month-tamara-zecevic/ Via https://diamondsjewelrynet.tumblr.com/post/182109096782
Stilla Arc is defined by connections, movement and softened structural forms that make a bold statement. The collection draws inspiration from the natural formation of liquid droplets; ‘Stilla’ being the Latin for this beautiful phenomenon. Each new piece has characteristic beaded elements that create feminine geometric shapes, enlivened with a series of smooth sweeping curves. Shop the Stilla Arc collection now
The innovative beaded formations add delicacy to eye-catching shapes, lined with sapphires for a touch of opulence. By mixing beaded and smooth textures for tactility, this versatile, playful jewellery moves with you. With orbital motifs amplifying the designs, Stilla Arc embodies an effortlessly striking approach to jewellery, whether worn individually or stacked. Featuring a fresh interpretation of the classic chain, Stilla Arc’s articulated elements give the jewellery geometry and fluidity all at once. Explore the pieces in the collection
Green onyx gemstones bring vibrancy to the collection with their vivid hue. Each green onyx piece has been handcrafted in a spectacle setting, which fully displays the gemstone so that it can catch the light and reflect its colour beautifully when worn. Discover Stilla Arc
Stilla Arc is all about new interpretations. Innovative structures, unique links and interlocking shapes come together to enhance bracelets, pendants and rings, while statement hoops and chokers boldly bring a touch of effortless luxury to the collection. Shop the collection
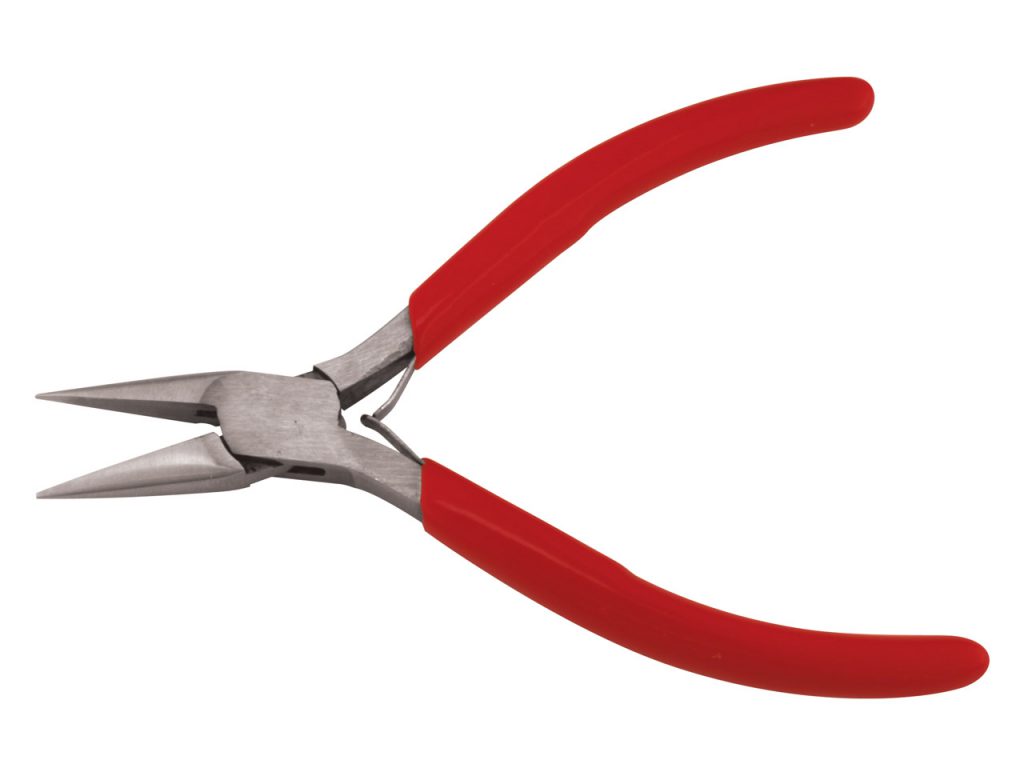
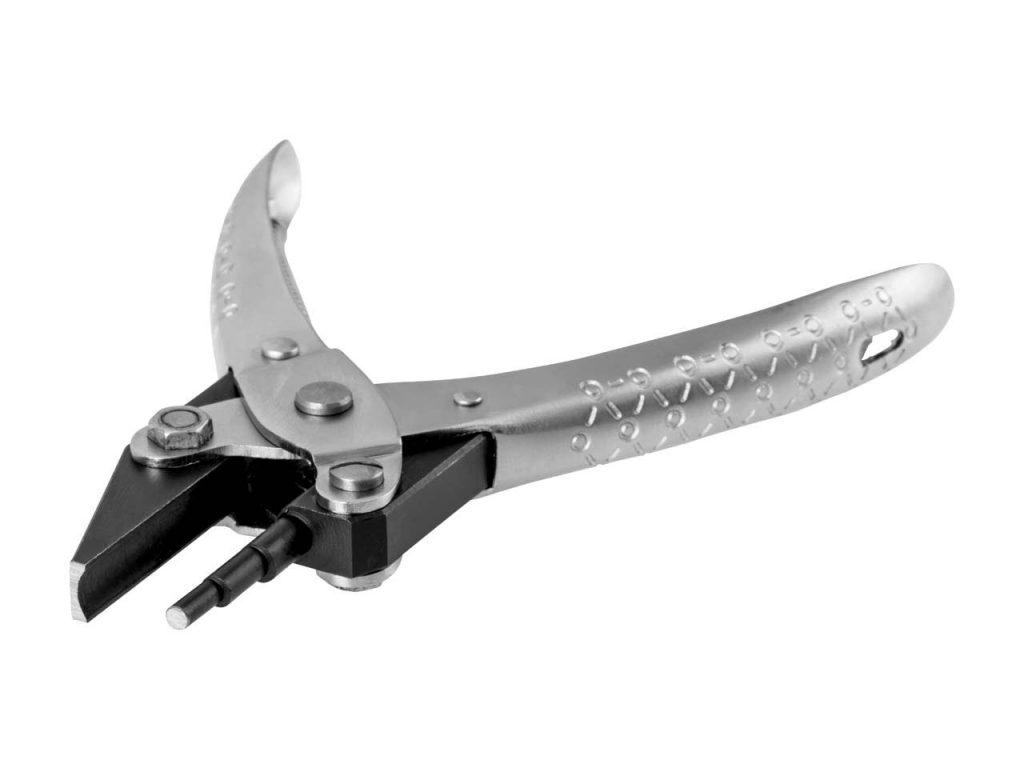
// window.fbAsyncInit = function() { FB.init({ appId : '1588642588022218', xfbml : true, version : 'v2.5' }); }; // (function(d, s, id){ var js, fjs = d.getElementsByTagName(s)[0]; if (d.getElementById(id)) {return;} js = d.createElement(s); js.id = id; js.src = “http://connect.facebook.net/en_US/sdk.js”; fjs.parentNode.insertBefore(js, fjs); }(document, ‘script’, 'facebook-jssdk’)); source https://diamonds-jewelry.net/top-posts/stilla-arc-jewellery-the-astley-clarke-blog/ Via https://diamondsjewelrynet.tumblr.com/post/182060380662 Classic parallel pliers are an essential bench item, and are often part of even the most basic tool kit for jewellers. Quite different in appearance from other pliers, parallel action pliers hold their position thanks to a compound box joint system, which means they provide an extremely strong grip and won’t spring back once pressure is released.
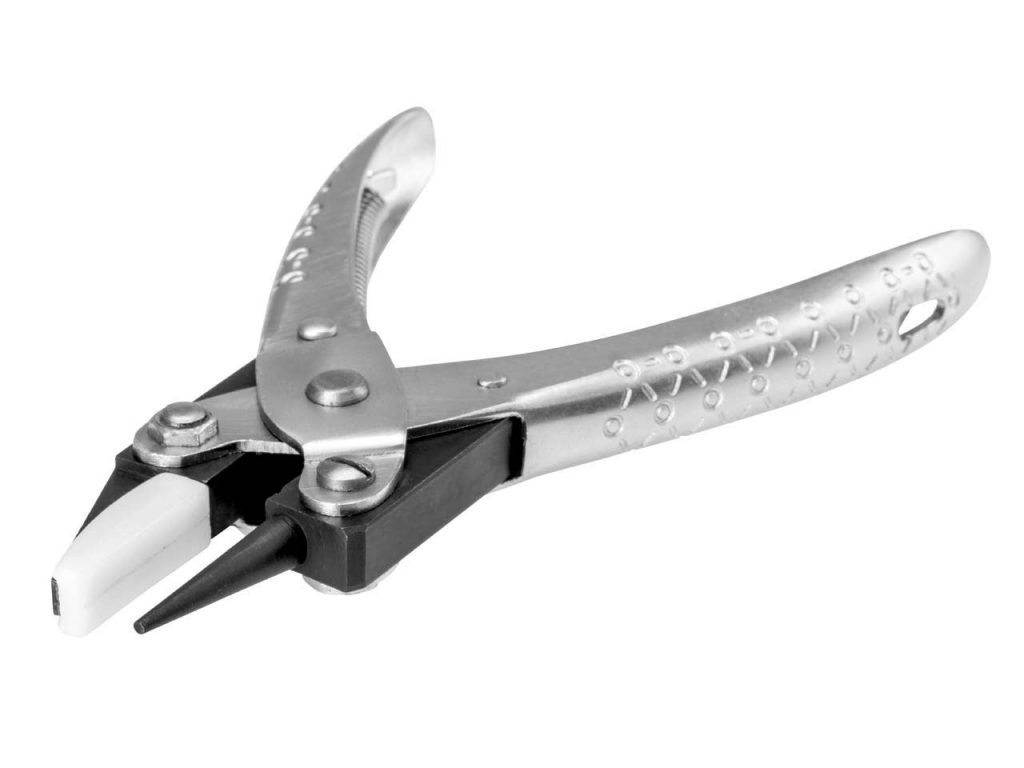
Classic Parallel Action Pliers, Flat Nose (999 PR01) As the name suggests, the jaws of parallel pliers remain as such along their entire length so you need not worry about positioning metal within them as the results are uniform throughout. Particularly useful for wirework, these pliers are ideal for straightening and flattening out kinks in wire, jump rings, earring fittings and much more besides, but are also useful for creating nice clean bends thanks to their uniform shape and sharp right angles. Nylon Jaw Parallel Action PliersYou might be surprised to discover that there are in fact many designs available within the classic parallel pliers family, with no less than 14 different versions now available at Cooksongold – including two versions with nylon jaws which help to protect metal from marks whilst you are working. Nylon jaws are also particularly useful when working with sheet as well as wire, to give you that little bit of extra confidence against damage. You can choose from the classic flat nose design or the innovative round/nylon flat nose version pictured below, which has a combination of both nylon and steel jaws to gently hold work whilst shaping. Both of these pliers are supplied with replacement nylon jaws, which can also be purchased separately when they eventually wear out.
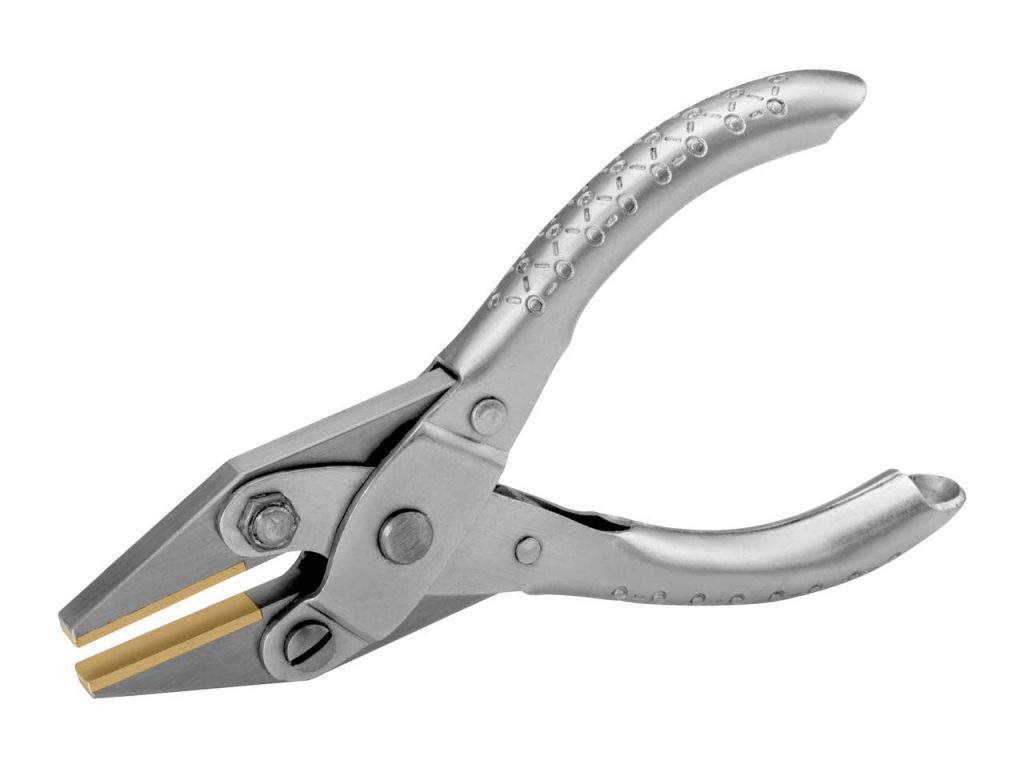
Classic Parallel Action Pliers, Round/Nylon Flat Nose (999 PR08) Brass Jaw Parallel Action PliersHowever, if you require a slightly firmer grip but still want to protect your work against nicks and marks, these classic parallel pliers are also available with a brass jaw. It is the same classic flat nose plier design, but the softer brass plates are positioned towards the tips of the jaws to provide a little extra protection for both bending and flattening. Brass offers a grip somewhere between the nylon and the steel options, so these pliers are ideal if you are looking for something in the middle ground.
Classic Parallel Action Pliers, Brass Jaw Flat Nose (999 PR03) Parallel Action Pliers for Bending MetalIf bending metal is your prime concern, then there are many other options within the range which will facilitate with this. Both curves and right angles are covered, along with some of the more complex forms such as concave (pictured below) and bail making. Each will provide uniformity and consistency to jewellery pieces, which is vital for any sort of repeat work or small scale batch production.
Classic Parallel Action Pliers, 3 Step Round/Concave (999 PR14) The parallel action mechanism itself is tried and tested and has stood the test of time, which is why we now offer so many different variations on a classic and reliable design. Many jewellers have had their original flat nose pair of parallel pliers for years and they are still going strong, so it is safe to say that these particular classic parallel action pliers are fantastic value for money whether you are just starting out or looking for new jewellery tools to add to your existing collection. Don’t forget, a variety of other jewellery making pliers are also stocked in our range – so make sure you have the right jewellery tools for the job and browse the extensive selection today. source https://diamonds-jewelry.net/top-posts/what-are-classic-parallel-action-pliers/ Via https://diamondsjewelrynet.tumblr.com/post/182054844602 Getting to know the anatomy of engagement rings? This blog post will help you learn about some of the terminology used when referring to the main element of any ring: the ring shank. What is a ring shank?The ring shank is quite simply the band of the ring. Each different type of ring shank is often categorised by its appearance. Below we’ll detail some of the most commonly seen types of ring shanks, and some of the more unusual ones too. Other ring elements you’ll need to know:
Want to know more about popular types of engagement ring styles and settings? Take a look at our guide to different types of engagement ring styles and read more about the varied types of engagement ring your customer could ask for. 1. Straight shank
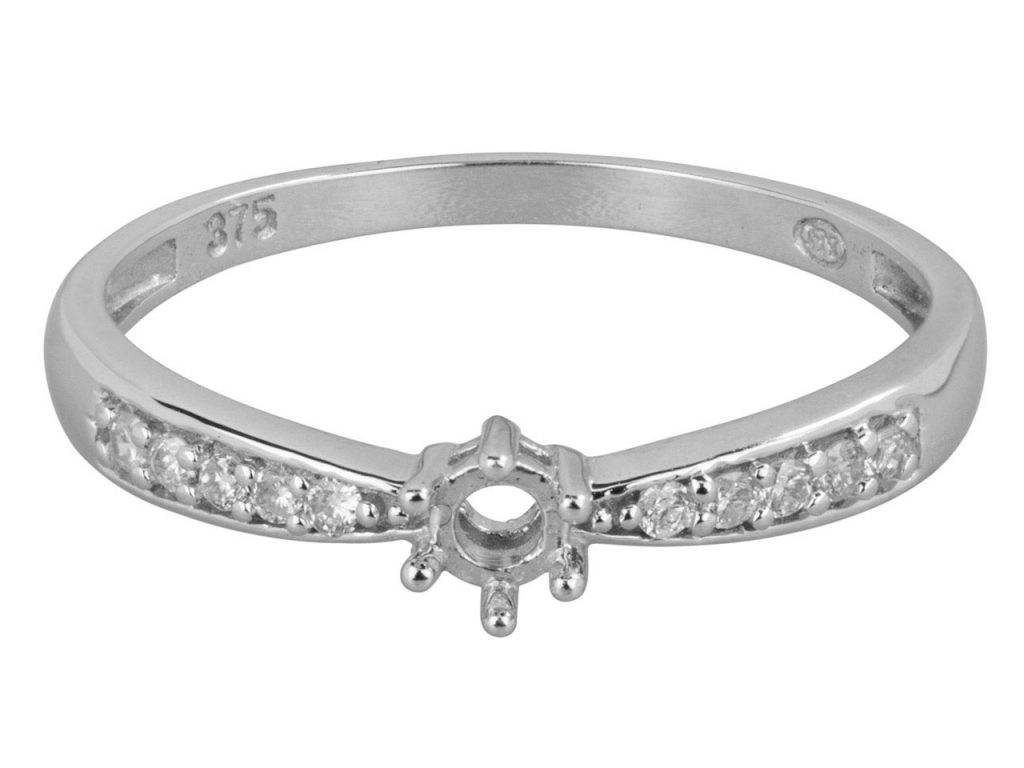
A straight ring shank is just as it sounds. The band of the ring is straight and doesn’t taper off or split. When you’re learning how to create rings, this will probably be the first type of ring shank that you make due to its simple construction. Straight shanks are most commonly flat edged. This means that the edges of the shank were not rounded off. Instead, they’re formed with a rectangular strip of metal leaving you with flat edges all the way around the band. Where the edges of a ring shank are rounded off, this can be referred to as a comfort fit, as it more naturally fits the circumference of your finger. 2. Tapered shank
A tapered shank is when the band tapers off to a thinner section either where the stone is set or in the opposite direction from where the stone is set. When the band tapers off to a thinner section on both sides of the stone, it can make the stone look larger and make the band itself look much more delicate. 3. Cathedral shank
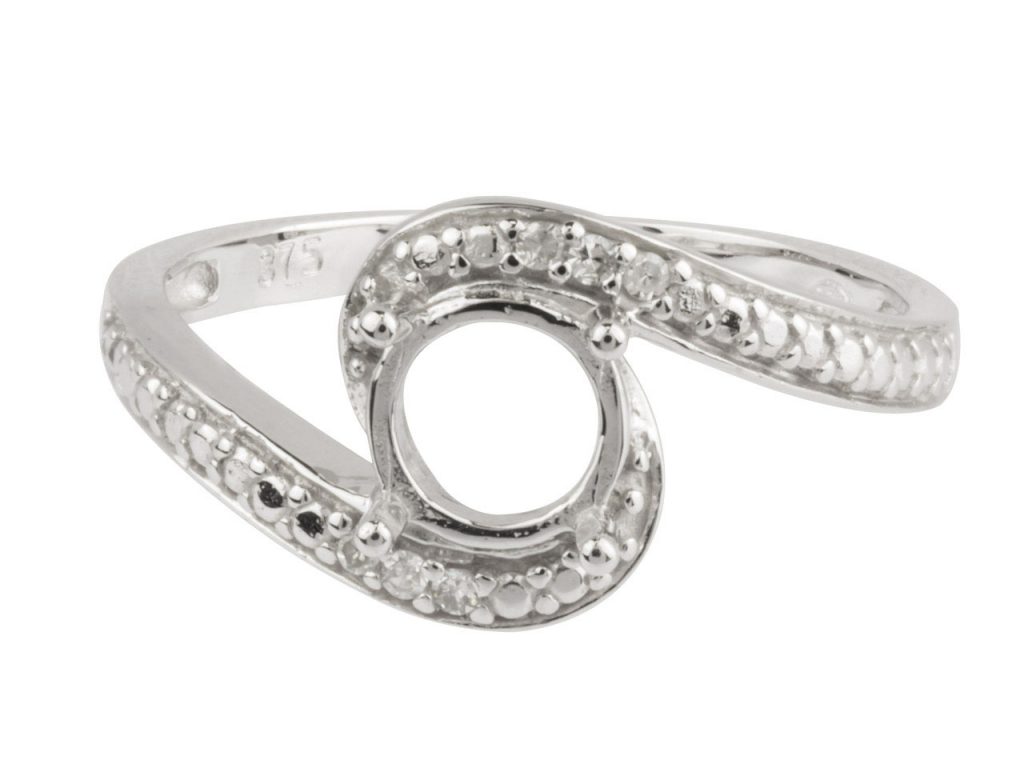
A cathedral ring shank is when the stone at the centre is framed by two arches. This is when the two ends of the shank are lifted to create these two arches just below the stone. It’s almost as if the two arches are supporting the stone setting, mimicking the grand architecture of cathedrals but also making the stone much more prominent. 4. Split ring shankA split ring shank is a much more complex design as the band splits into two before it meets the stone at the top of the band. This can give the illusion of two bands and can be as subtle or as prominent as the customer would like. The split shank design can also be modified so that as the band splits off in two, it can cross over with a woven or twisted design until it meets back up again where the stone is set. 5. Bypass ring shank
With a bypass ring shank, the two ends of the band will not uniformly meet the stone. Instead, each end of the band will run around the stone, almost as if it’s bypassing it. This creates the illusion that the band is flowing around or overlapping the stone. 6. Knife-edge shank
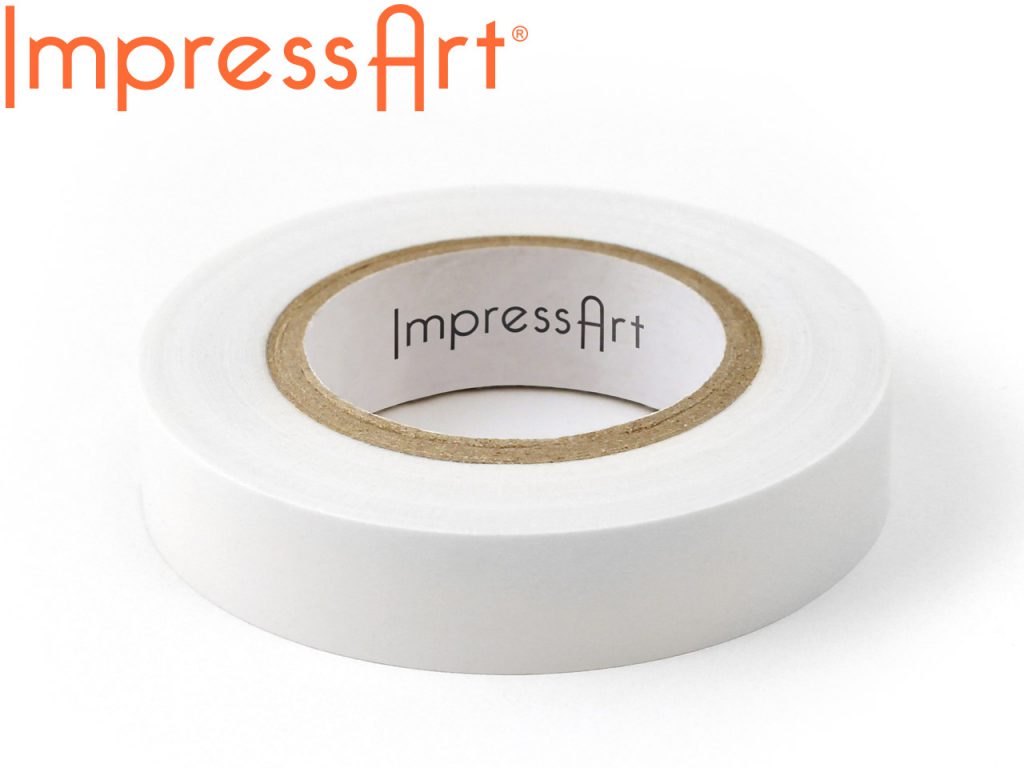
A knife edge shank is named so because of its sharp edge that runs along the outer edge of the shank. Of course, it’s not razor sharp, but it adds a different look to a ring shank. It adds a new element of design to the shank with two slanted sides that meet to a more prominent point than you would usually see in traditional shanks. 7. Interlocked ring shankAn interlocked ring shank style is when the engagement ring and the wedding band interlock together perfectly. This can be done in many ways and is interpreted in many ways by different jewellers. It may be that one jeweller creates the engagement ring fits inside the wedding band or it may be that the two bands follow the same silhouette so that they sit alongside each other perfectly when worn. Whether you plan on creating your own ring shanks from scratch or picking up pre-made ring shanks ready for stone setting, we have everything you need at Cooksongold. Take a look at our ring shank and cast rings range as well as our silver and gold casting grain. source https://diamonds-jewelry.net/top-posts/7-different-types-of-ring-shanks/ Via https://diamondsjewelrynet.tumblr.com/post/182002175422 If you’re new to jewellery making and you’re interested in learning how to use metal stamping tools, you’re in the right place. Take a look at our video, where we explain our top five metal stamping tools and read on to find out some of our top tips when it comes to metal stamping techniques so that you can stamp your next piece, safely, and with a personal touch. What are our top 5 metal stamping tools?1. Stamp straight tapeUsing stamp straight tape is a really quick, easy way to line up your stamping designs. For example, if you’re stamping a person’s name on your metal, simply use a stretch of tape across your metal and it will keep each letter nice and straight.
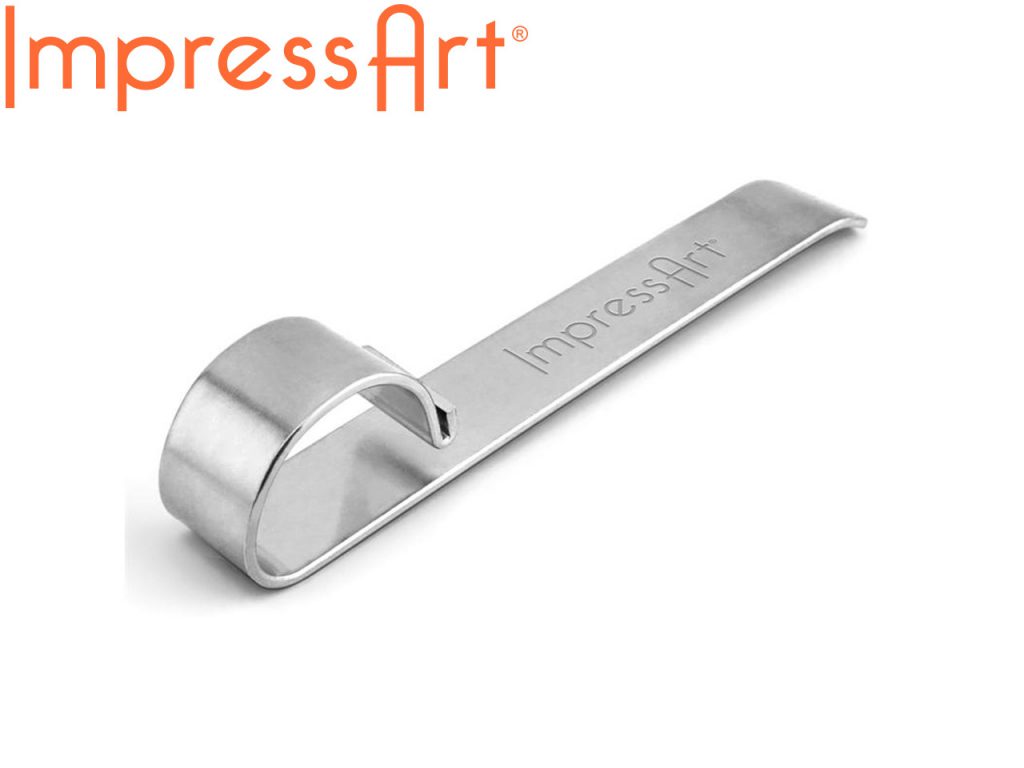
That way, you don’t need to worry about accidentally slipping or leaning at an angle, resulting in a slanted design on your piece. 2. ImpressArt bracelet bending barA bracelet bending bar is a simple tool that allows you to bend metal strips easily with no fuss, into a bracelet shape. It can be used for bending metal strips up to a maximum of 1 1/2″ wide (3.81cm), and is also available in a kit containing aluminium cuff bangle blanks.
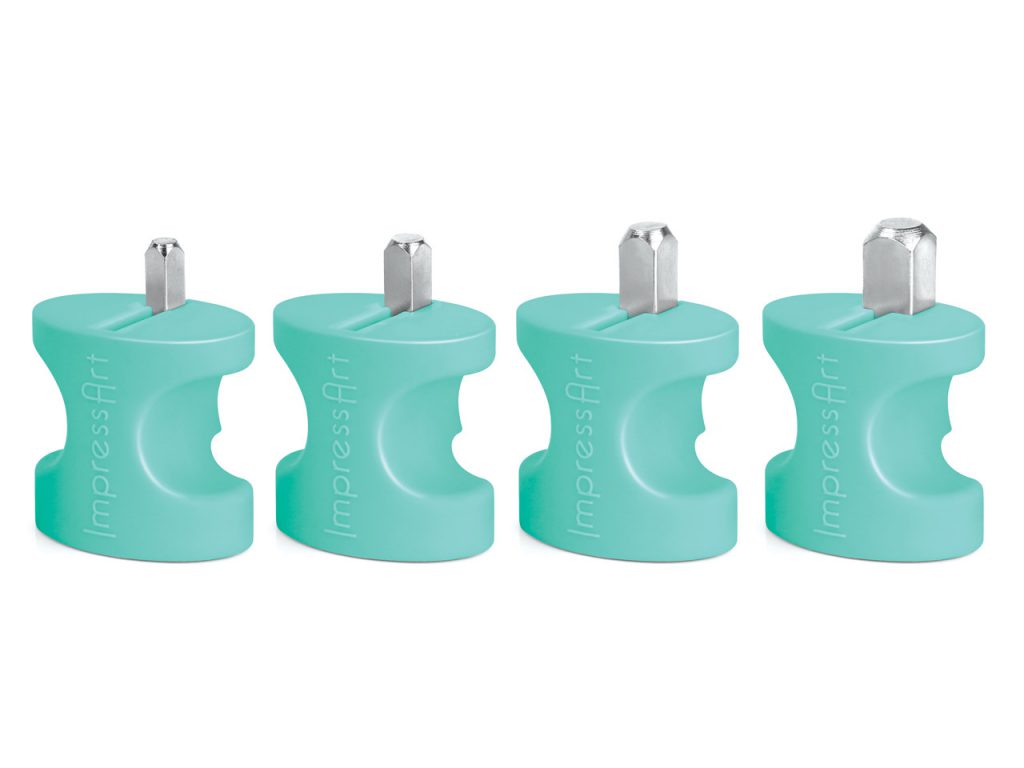
To use, simply place your metal strip onto the curved end of the bending bar, and twist your metal strip over the curved edge a little further than 90 degrees. Repeat this until you have your ideal bracelet shape. You can then use a set of jewellery making pliers to perfect your bracelet. 3. ImpressArt strike jigIf you’re new to metal stamping, you might be nervous about using quite a weighty jewellery hammer, in case you accidentally flinch and slip in the process and hit your fingers. Sound familiar? Not only is this dangerous, but it will cause uneven impressions. Instead, use a strike jig. You’ll find them in a range of sizes, including 3, 4, 6 and 9.5mm.
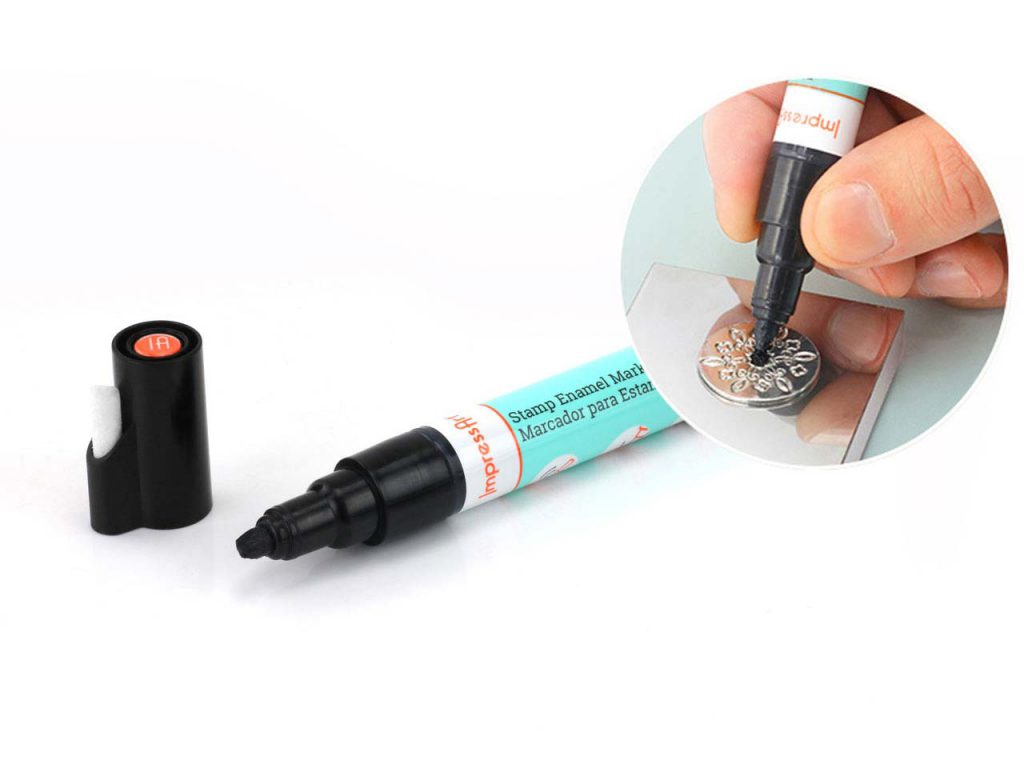
You’ll need to line it up, slide your stamp into it and grip it securely with your fingers. Then, you can use your jewellery hammer to make your impression safely. 4. Stamping inkWhen you create your impressions on your piece of metal, you’ll want to be able to clearly see your design as an end result. ImpressArt enamel ink allows you to do exactly this. You might have used a Sharpie pen to do this previously, but this only works on certain types of metals.
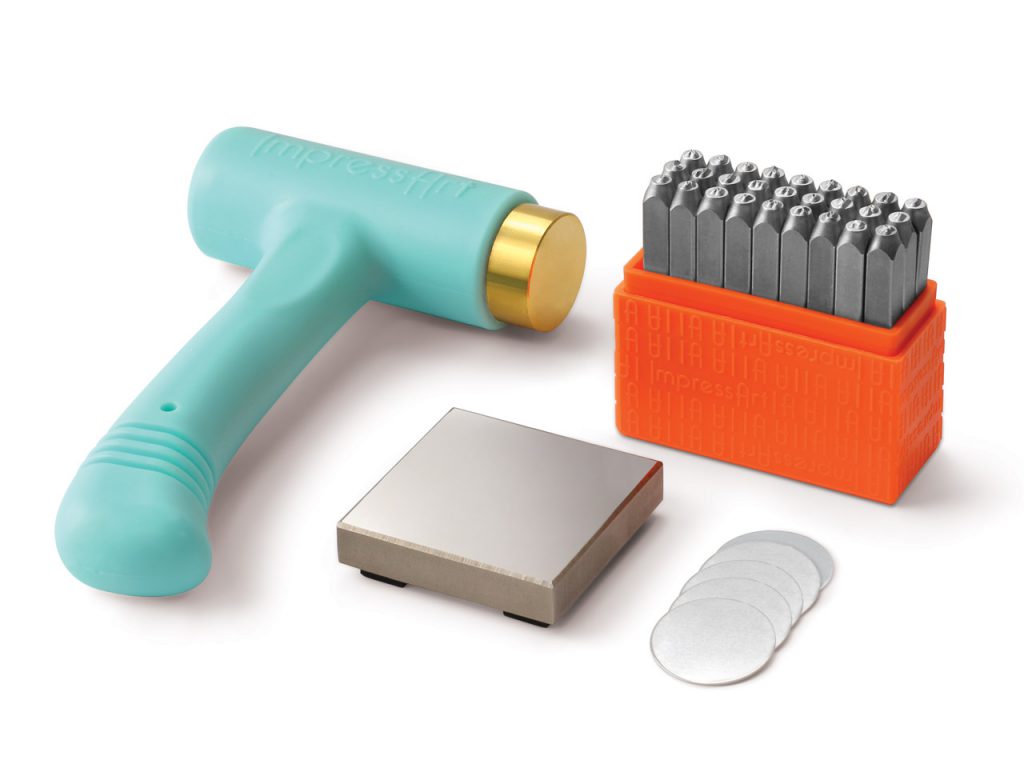
And, as you progress, you’re likely to want to experience with different colours, just as other jewellery makers do. 5. ImpressArt metal stamping kitIf you’re a newbie to metal stamping and you’re not sure how to hand stamp jewellery, the ImpressArt metal stamping kit could be your first steps to becoming an expert.
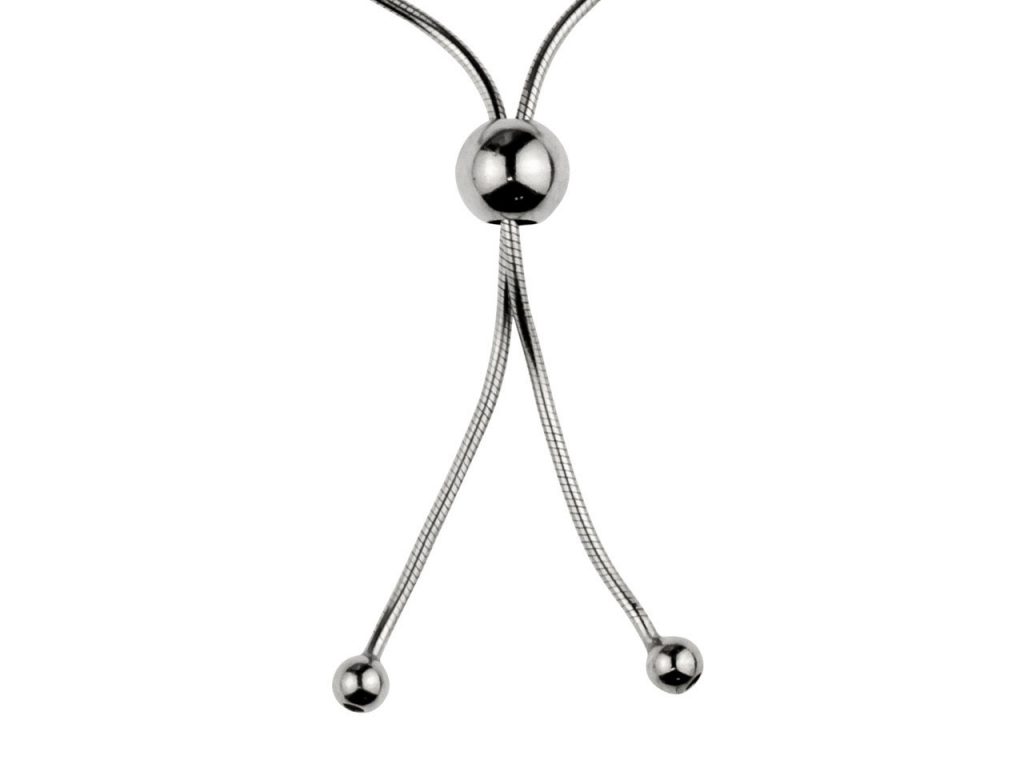
Inside it, you’ll find all of the key tools to get started, including your jewellery hammer and a steel block. You’ll be creating custom stamp jewellery designs in no time! Now you know more about how to use popular metal stamping tools, you are ready to start stamping and personalising your jewellery pieces! Find these and all of your other metal stamping tools and accessories at Cooksongold, which are available to order online today. source https://diamonds-jewelry.net/top-posts/what-are-the-top-5-metal-stamping-tools/ Via https://diamondsjewelrynet.tumblr.com/post/181921158442 Following our guide to the essential types of jewellery clasp, which looked at the pros and cons of basic clasps you might use in handmade jewellery projects, we will now cover some of the more elaborate styles available as well as suggesting how and when is suitable to use them. There are three main factors to consider when choosing a clasp for your jewellery design; size/weight, price and aesthetics. Clasps all do a similar job so there is always more than one solution to choose from, however certain styles are ultimately more suited to some jobs than others and so this is why we have put together this handy guide to give you a helping hand when it comes to selecting the clasp you need. Sliding Clasps Sliding clasps are a relatively new concept in jewellery. They contain a silicone insert with a small hole in the centre, which will grip anything that is pushed through it, thus completing the loop and securing the piece.
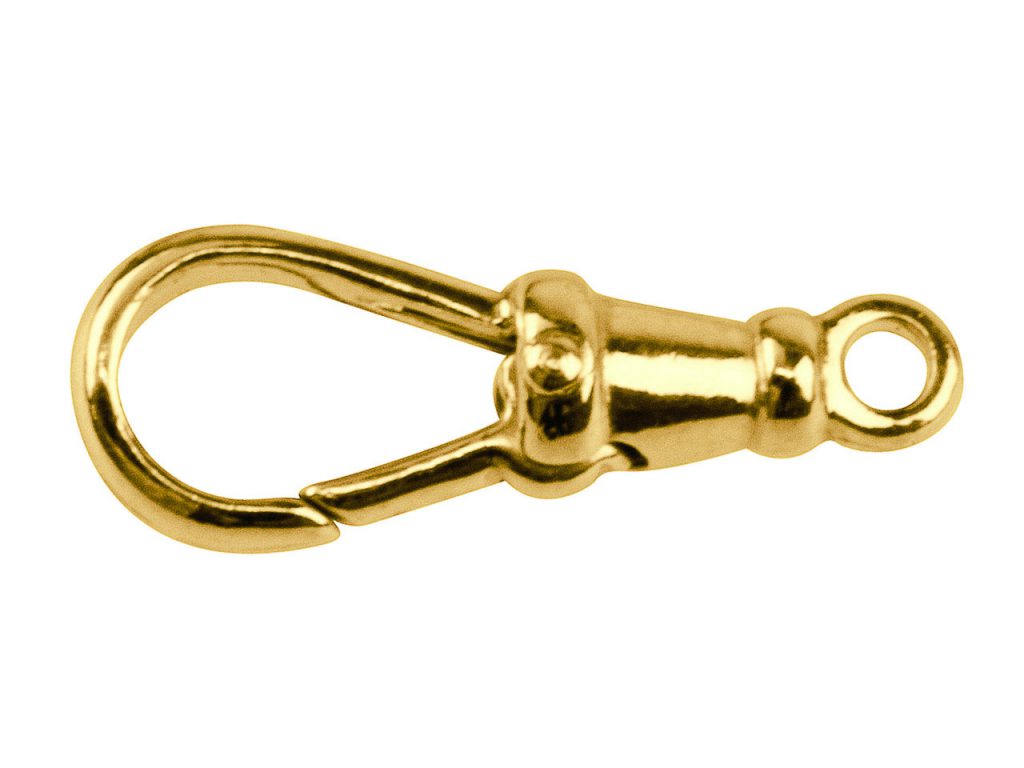
These types of clasp are great for casual style beaded bracelets and necklets, and allow the size to be adjusted simply by pushing the slider clasp up or down. They do require a slightly more bulky chain with a substantial end to work well, to enable the silicone to grip it as it is pushed through the clasp. Snake, box or bead chain will all work well, as well as thicker leather or cotton, provided they have nice solid end caps. Albert Swivel Clasps Albert swivel clasps tend to be on the larger, side and were named after Prince Albert who was consort to Queen Victoria in 1837 – 1901. They were designed to go on the end of pocket watch chains, to enable the wearer to bring out their watch and look at it without the attached chain getting twisted and tangled.
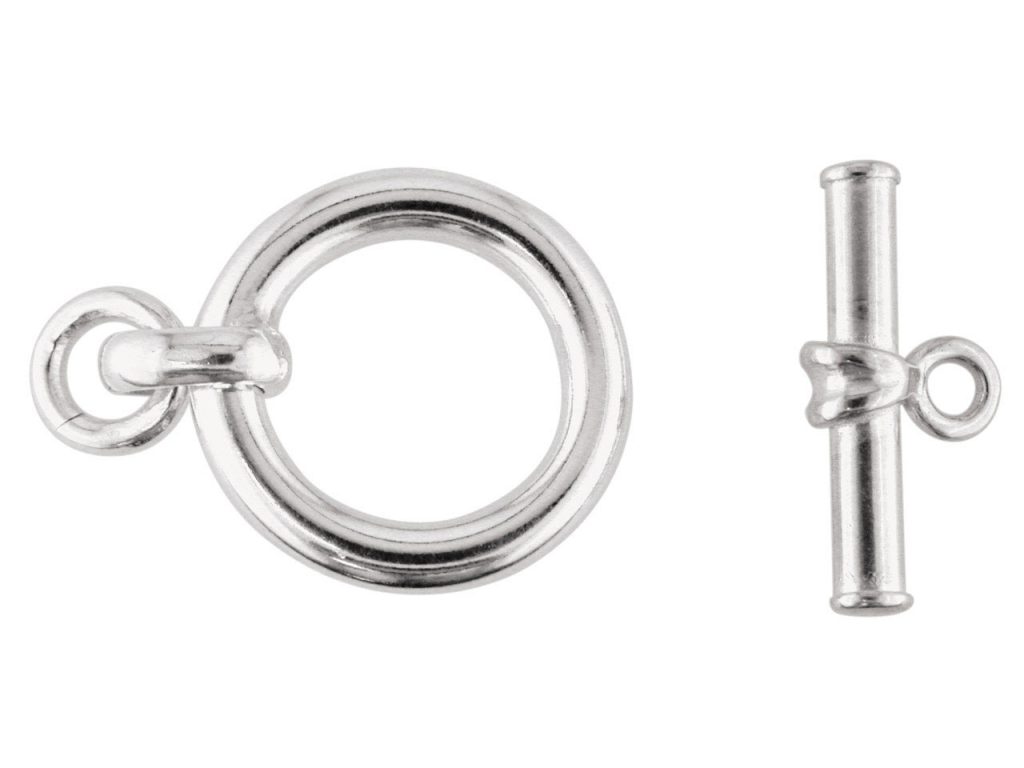
They are quite unique in their design and are a great choice for functional objects such as key rings or bag charms, where full manoeuvrability is essential. Be careful though, as many ‘swivel clasps’ are sold with a fixed top and don’t actually swivel – so you need to read the details carefully before purchasing. Sizes in our range very between 13mm – 29mm, and are available in sterling silver, 9ct gold and bronze which means there are plenty to choose from. Hook and Ring Clasps and T-Bar and Ring Clasps These clasps have been grouped together as they both work in the same way.
Once the hook or t-bar is inserted into the ring, the weight of the necklace or bracelet will pull each finding in opposing directions, thus securing them together. It is a simple mechanism but gravity ensures that it works! The t-bar and ring concept comes in many different designs, and is often quite decorative so can become an integral part of the design of your piece. You just need to ensure that the t-bar itself has a good over-lap of the ring, and that there is enough weight in the body of the bracelet or necklace to ensure a secure connection. Hook and ring clasps are suited to lighter pieces, and are often used for beaded designs where a more delicate fitting is more appropriate. If you are sceptical of these types of designs, don’t be as they work well and are more secure than they look. Of course there are many more types of jewellery clasp to choose from, including bolt rings, lobster clasps, trigger clasps and magnetic clasps, which you can read about in this blog article. Remember to look out for the next part in our guide to jewellery clasps too, when we take closer look at yet more of the clasp designs available. Don’t forget, you can also explore our Essential Guide to Jewellery Findings to learn more about different styles of clasp, alongside many other types of essential jewellery findings. source https://diamonds-jewelry.net/top-posts/fancy-jewellery-clasps-and-how-to-use-them/ Via https://diamondsjewelrynet.tumblr.com/post/181869551687 |


 RSS Feed
